የተጠቃሚዎች አስተዳደር
የተጠቃሚዎች አስተዳደር (User Management) ባህሪ የ ነካ መሣሪያውን ማን ሊጠቀምበት እንደሚችል ለመቆጣጠር ያስችላል። ተጠቃሚዎች በ CRM ካርዶች የሚለዩ ሲሆን፣ እያንዳንዱ ተጠቃሚ ምን ማድረግ እንደሚችል የሚወስን የፈቃድ ደረጃ (access level) አለው።
ወደ ተጠቃሚዎች አስተዳደር መግባት
- ከመነሻ ማውጫው (Home Menu) ላይ ወደ POS ይሂዱ።
- Users የሚለውን ይምረጡ።
- ለመግባት የመካከለኛውን ቁልፍ (ቁልፍ 7) ይጫኑ።
የሚከተሉትን አማራጮች ያያሉ፦
| አማራጭ | መግለጫ |
|---|---|
| ቆልፍ | የትኞቹን መተግበሪያዎች መቆለፍ እንደሚፈልጉ ለመምረጥ። |
| ክፈት | ከተቆለፉት መተግበሪያዎች ዝርዝር ውስጥ ለማንሳት። |
| መቆልፊያ | ለመተግበሪያዎች የመቆለፊያ ዘዴን ለመወሰን። |
| የካርድ ደረጃ | የተጠቃሚን የፈቃድ ደረጃ ለመቀየር። |
| የካርድ ደረጃ አሳይ | የወቅቱን ተጠቃሚ የፈቃድ ደረጃ ለማየት። |
| ፒን ቀይር | የተጠቃሚውን የፒን (PIN) ቁጥር ለመቀየር። |
| አስገባ | በመሣሪያው ላይ አዲስ ተጠቃሚ ለመመዝገብ። |
| አስወጣ | ተጠቃሚን ከመሣሪያው ላይ ለመሰረዝ። |
| አዲስ ካርድ | አዲስ CRM ካርድ ለማውጣት። |
| የማሽን ሞድ | የመሣሪያውን የአሠራር ሁነታ ለመቀየር። |
አስፈላጊ ማሳሰቢያ፦ በተጠቃሚዎች አስተዳደር ስር ያሉትን አብዛኞቹን ማውጫዎች ለመጠቀም የማስተር (Master) ካርድዎ ያስፈልግዎታል። የማስተር ካርድዎ ከኔካ መሣሪያው ጋር አብሮ የመጣው ነባሪ ካርድ ነው።
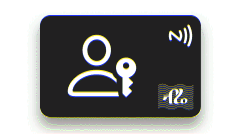
- የሚከተለው ስክሪን ሲመጣ የማስተር ካርድዎን በመሣሪያው ላይ ያስጠጉ (tap ያድርጉ) ማለት ነው።
መተግበሪያዎችን መቆለፍ
መተግበሪያዎችን መቆለፊያ ዝርዝር ውስጥ ማከል
- ቆልፍ የሚለውን ይምረጡ።
- ፍቃድ ለመስጠት የማስተር CRM ካርድዎን ያስጠጉ።
- ከመሣሪያው መደበኛ ማውጫ ጋር ተመሳሳይ የሆነ የመቆለፊያ ማውጫ ውስጥ ይገባሉ፤ ልዩነቱ በስተቀኝ በኩል የቁልፍ ምልክት መኖሩ ብቻ ነው።
- በማውጫው ውስጥ በመዘዋወር መቆለፍ የሚፈልጓቸውን መተግበሪያዎች ይምረጡ።
- ለእያንዳንዱ መተግበሪያ ሊኖረው የሚገባውን የፈቃድ ደረጃ ያስገቡ።
- ምርጫዎን ያረጋግጡ።
- ሂደቱን ለማፅደቅ/ለማጠናቀቅ የተግባር (Function) ቁልፍን ተጭነው በመቀጠል የመካከለኛውን ቁልፍ ይጫኑ፤ ለመሰረዝ (abort) ከፈለጉ የበስተጀርባ (Backspace) ቁልፍን ተጭነው በመቀጠል የመካከለኛውን ቁልፍ ይጫኑ።
መተግበሪያዎችን ከቁልፍ ነፃ ማድረግ
- ክፈት የሚለውን ይምረጡ።
- ፍቃድ ለመስጠት የማስተር CRM ካርድዎን ያስጠጉ።
- ሁሉንም መተግበሪያዎች በአንድ ጊዜ ለመክፈት Yes የሚለውን ይምረጡ፣ ወይም የተወሰኑትን ብቻ ለመክፈት በማውጫው ውስጥ ይዘዋወሩ።
- ምርጫዎን ያረጋግጡ።
- ሂደቱን ለማፅደቅ/ለማጠናቀቅ የተግባር (Function) ቁልፍን ተጭነው በመቀጠል የመካከለኛውን ቁልፍ ይጫኑ፤ ለመሰረዝ ከፈለጉ የበስተጀርባ (Backspace) ቁልፍን ተጭነው በመቀጠል የመካከለኛውን ቁልፍ ይጫኑ።
የመቆለፊያ ዘዴ
- መቆለፊያ የሚለውን ይምረጡ።
- ፍቃድ ለመስጠት የማስተር CRM ካርድዎን ያስጠጉ።
- የመቆለፊያ ዘዴውን ይምረጡ፦
- Open – ምንም ቁልፍ የለም (ነባሪ)።
- Via Card – የተቆለፉ መተግበሪያዎችን ለመክፈት ካርድ ማሳየት ይጠይቃል።
- Via PIN – የተቆለፉ መተግበሪያዎችን ለመክፈት የፒን (PIN) ቁጥር ይጠይቃል።
- Card + PIN – ካርድም ሆነ የፒን ቁጥር በአንድ ላይ ይጠይቃል።
ተጠቃሚ ማከል
- አስገባ የሚለውን ይምረጡ።
- ፍቃድ ለመስጠት የራስዎን CRM ካርድ (ደረጃ 1 መሆን አለበት) ያስጠጉ።
- የአዲሱን ተጠቃሚ ካርድ በNFC ማንበቢያ ቦታ ላይ (ቁጥር 1) ያስጠጉ።
- መሣሪያው የአንድ ጊዜ የይለፍ ቃል (OTP) ያሳያል።
- ይህንን OTP ከቁጥሩ በላይ ወደሚታየው አጭር የጽሑፍ መልዕክት ቁጥር (short code) ይላኩ።
- የOTP ሂደቱ ከተረጋገጠ ለማጽደቅ የመካከለኛውን ቁልፍ ይጫኑ።
- ተጠቃሚው ወደ መሣሪያው ይታከላል፤ መሣሪያው ራሱን በራሱ በማስጀመር (reset) ከተጠቃሚው ማዋቀሪያ ጋር ይጣጣማል።
ማሳሰቢያ፦ ለOTP ጥቅም ላይ የሚውለው የስልክ ቁጥር ከቲን (TIN) ቁጥሩ ጋር የተመዘገበው ተመሳሳይ ቁጥር መሆን አለበት።
ተጠቃሚን መሰረዝ
- አስወጣ የሚለውን ይምረጡ።
- ፍቃድ ለመስጠት የራስዎን CRM ካርድ (ደረጃ 1/አስተዳዳሪ መሆን አለበት) ያስጠጉ።
- ከዝርዝሩ ውስጥ መሰረዝ የሚፈልጉትን ተጠቃሚ ይምረጡ።
- የተጠቃሚውን ካርድ በNFC ማንበቢያ ቦታ ላይ (ቁጥር 1) ያስጠጉ።
- መሣሪያው OTP ያሳያል።
- ይህንን OTP ከቁጥሩ በላይ ወደሚታየው አጭር የጽሑፍ መልዕክት ቁጥር (short code) ይላኩ።
- የOTP ሂደቱ ከተረጋገጠ ለማጽደቅ የመካከለኛውን ቁልፍ ይጫኑ።
- ተጠቃሚው ከመሣሪያው ላይ ይሰረዛል።
ማሳሰቢያ፦ ይህንን ማውጫ መሣሪያውን ለአከፋፋዩ (distributor) ለመመለስ በሚፈልጉበት ጊዜ እና ከአከፋፋዩ ጋር ባሉበት ወቅት ብቻ ይጠቀሙበት። ለOTP ጥቅም ላይ የሚውለው የስልክ ቁጥር ከቲን (TIN) ቁጥሩ ጋር የተመዘገበው ተመሳሳይ ቁጥር መሆን አለበት።
አዲስ ካርድ ማውጣት
- አዲስ ካርድ የሚለውን ይምረጡ።
- ባዶ CRM ካርድ በNFC ማንበቢያ ቦታ ላይ (ቁጥር 1) ላይ አቅርበው ይያዙ።
- መሣሪያው OTP ያሳያል።
- ይህንን OTP ከቁጥሩ በላይ ወደሚታየው አጭር የጽሑፍ መልዕክት ቁጥር (short code) ይላኩ።
- የOTP ሂደቱ ከተረጋገጠ ለማጽደቅ የመካከለኛውን ቁልፍ ይጫኑ።
- PIN ያስገቡ – ለተጠቃሚው ባለ 6 አኃዝ የፒን ቁጥር ይጻፉ።
- የፒን ቁጥሩን በድጋሚ በማስገባት ያረጋግጡ Lights።
- መሣሪያው የNFC ንባብ ስክሪን ሲያሳይ ካርዱን ስክሪኑ ላይ ያስጠጉ እና ሂደቱን እስኪጨርስ ድረስ ካርዱን አያንሱት።
- መረጃው በካርዱ ላይ ተጽፎ ሲነቃ መሣሪያው "Card Activate" የሚል ስክሪን ያሳያል።
የካርድ የፈቃድ ደረጃን ማዋቀር
- የካርድ ደረጃ የሚለውን ይምረጡ።
- ፍቃድ ለመስጠት የማስተር CRM ካርድዎን ያስጠጉ።
- መቀየር የሚፈልጉትን ካርድ ያስጠጉ።
- አዲሱን የፈቃድ ደረጃ ያስገቡ።
- ለውጡን ያረጋግጡ።
- የካርዱ የፈቃድ ደረጃ ይሻሻላል።
ማሳሰቢያ፦ የማስተር (Master) ካርድን የፈቃድ ደረጃ መቀየር አይችሉም።
የተጠቃሚ የፈቃድ ደረጃዎች
- ለአንድ ካርድ ከደረጃ 1 ጀምሮ የፈቃድ ደረጃዎችን መስጠት ይችላሉ።
- የፈቃድ ደረጃዎች በነባሪነት 1 ናቸው።
- የካርድ ደረጃዎችን በሚከተለው መልኩ መጠቀም ይችላሉ፦
| ደረጃ | መዳረሻ |
|---|---|
| 1 (Admin / አስተዳዳሪ) | ሙሉ መዳረሻ – ማከል/መሰረዝ እና ቅንብሮችን መቀየር ይችላል። |
| 2 (Manager / ስራ አስኪያጅ) | ደረሰኝ መቁረጥ፣ የዋጋ ዝርዝር ማስተዳደር እና ሪፖርቶችን ማየት ይችላል። |
| 3 (Cashier / ገንዘብ ያዥ) | ደረሰኝ መቁረጥ ብቻ ይችላል። |
የካርድ ደረጃን ማየት
- የካርድ ደረጃ አሳይ የሚለውን ይምረጡ።
- ማንኛውንም CRM ካርድ በNFC ማንበቢያ ቦታ ላይ ያስጠጉ።
- መሣሪያው የተጠቃሚውን ደረጃ በስክሪኑ ላይ ያሳያል።
- ለመዝጋት የመካከለኛውን ቁልፍ (ቁልፍ 7) ይጫኑ።
የፒን (PIN) ቁጥር መቀየር
- Change PIN የሚለውን ይምረጡ።
- የራስዎን CRM ካርድ በNFC ማንበቢያ ቦታ ላይ ያስጠጉ።
- በተመዘገበው ስልክ ቁጥርዎ ላይ OTP ይላካል።
- ለማረጋገጥ የOTP ቁጥሩን ያስገቡ Lights።
- አዲሱን የፒን (PIN) ቁጥር ያስገቡ (6 አኃዝ)።
- አዲሱን ፒን በድጋሚ በማስገባት ያረጋግጡ Lights።
- የራስዎን CRM ካርድ በNFC ማንበቢያ ቦታ ላይ ያስጠጉ።
- አዲሱ የፒን ቁጥር በካርዱ ላይ ይሻሻላል።
የመሣሪያ ሁነታን ማዋቀር
የመሣሪያው ሁነታ የትኞቹ ባህሪያት እንደሚሰሩ ይወስናል።
- **** የሚለውን ይምረጡ።
- የራስዎን የአስተዳዳሪ (admin) ካርድ በNFC ማንበቢያ ቦታ ላይ ያስጠጉ።
- በስክሪኑ ላይ የሚመጡትን መመሪያዎች ይከተሉ።
ማሳሰቢያ፦ ይህ የተለየ የአስተዳዳሪ ካርድ (ADMIN) የሚፈልግ ሲሆን በመደበኛ የCRM ካርድ አይሰራም።
User Management
The User Management feature allows you to control who can use the NEKA. Users are identified by CRM cards, and each user has an access level that determines what they can do.
Accessing User Management
- From the Home Menu, navigate to POS.
- Select Users.
- Press the middle key (button 7) to enter.
You will see the following options:
| Option | Description |
|---|---|
| Lock | Choose which apps to lock. |
| Unlock | Remove apps from the locked list. |
| Locked Method | Set the lock method for applications |
| Card Level | Change a user's access level. |
| View Card Level | View the current user's level. |
| Change PIN | Change a user's PIN. |
| Add | Register a new user on the device. |
| Remove | Remove a user from the device. |
| New Card | Issue a new CRM card. |
| Set Device Mode | Change the device operating mode. |
Important: You need your Master card for most of the menus under user management. Your master card is the default card that came with the neka device.
- The following screen means tap the Master card.
Application Locking
You can lock specific applications to restrict access.
Select Locked Apps
- Select Lock.
- Tap your Master CRM card to authorise.
- You will enter the lock menu which seems identical as the device menu except a lock icon will appear on the top right corner.
- Navigate through the menu and select the apps you want to lock.
- For each app, enter the access level.
- Confirm the selection.
- To finalize press function key fllowed by middle key and to abort press backspace key followed by middle key
Unselect Locked Apps
- Select Unlock.
- Tap your Master CRM card to authorise.
- Choose Yes to unlock all apps, or navigate through the menu to unlock specific ones.
- Confirm the selection.
- To finalize press function key fllowed by middle key and to abort press backspace key followed by middle key
Lock Method
- Select Lock Method.
- Tap your Master CRM card to authorise.
- Choose the lock method:
- Open – no lock (default).
- Via Card – require a card to access locked apps.
- Via PIN – require a PIN to access locked apps.
- Card + PIN – require both.
Adding a User
- Select Add.
- Tap your CRM card (must be level 1) to authorise.
- Tap the new user's card on the NFC reading area (number 1).
- The device will Show an OTP
- Send the OTP to the short code displayed above the OTP.
- If OTP is verified press middle key to confirm
- The user will be added to the device and the device will reset and configure it self per users configuration.
Note: The Phone number used for the OTP must be the same number registered with the TIN number.
Removing a User
- Select Remove.
- Tap your CRM card (must be level 1/Admin) to authorise.
- Choose the user to remove from the list.
- Tap the new user's card on the NFC reading area (number 1).
- The device will Show an OTP
- Send the OTP to the short code displayed above the OTP.
- If OTP is verified press middle key to confirm
- The user will be removed from the device.
Note: Ony use this menu when you are with the distributer and want to return the device to the distributer. The Phone number used for the OTP must be the same number registered with the TIN number.
Issuing a New Card
- Select New Card.
- Hold a blank CRM card against the NFC reading area (number 1).
- The device will Show an OTP
- Send the OTP to the short code displayed above the OTP.
- If OTP is verified press middle key to confirm
- Enter PIN – a 6‑digit PIN for the user.
- Confirm the PIN.
- When the device shows NFC reading screen tap the card on the screen and do not remove the card untill it finshes.
- The card will be written and activated and the device will show a "Card Activate" screen.
Setting Card Level
- Select Card Level.
- Tap your Master CRM card to authorise.
- Tap the card you want to change.
- Enter the new level.
- Confirm the change.
- The card level will be updated.
Note: You cannot change the level of the master card.
User Access Levels
- You can set access levels for a card starting from 1.
-
Access levels by default are 1.
-
You can use card levels as:
| Level | Access |
|---|---|
| 1 (Admin) | Full access – can add/remove, change settings. |
| 2 (Manager) | Can issue invoices, manage price list, view reports. |
| 3 (Cashier) | Can issue invoices only. |
Checking Card Level
- Select View Card Level.
- Tap any CRM card on the NFC reading area.
- The device will show the user's level on the screen.
- Press the middle key (button 7) to close.
Changing PIN
- Select Change PIN.
- Tap your CRM card on the NFC reading area.
- An OTP will be sent to your registered phone number.
- Enter the OTP to verify.
- Enter your new PIN (6 digits).
- Confirm the new PIN.
- Tap your CRM card on the NFC reading area.
- The PIN will be updated on the card.
Setting Device Mode
The device mode determines what features are available.
- Select Set Device Mode.
- Tap your admin card on the NFC reading area.
- Follow the on screen instructions.
Note: This requires a special admin card (not a regular CRM card).